Mailchimp Email Builder 2026: How It Works, Limits, Options
The Mailchimp email builder is the drag-and-drop editor you use to design every campaign in Mailchimp, and in 2026 it comes in two versions: the new builder (the default) and the legacy builder, which Mailchimp used to call the classic builder. This guide shows existing Mailchimp users which builder they are on, what their plan unlocks, how to build an email, and how to import a template from an external tool such as Postcards. Every Mailchimp feature and plan rule below was checked on Mailchimp’s own help center and pricing page in November 2026.
TL;DR
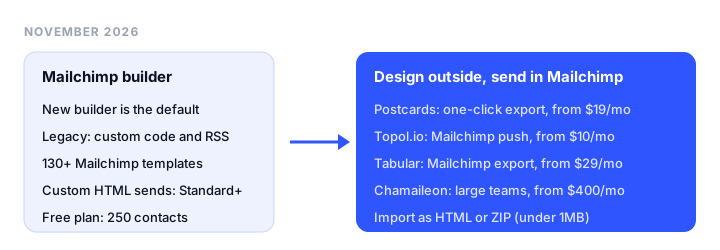
- Best for most Mailchimp users: the new builder. It is the default, has undo and redo, device-specific styles, and Survey and Apps blocks.
- Best for custom code or RSS emails: the legacy builder. It is the only Mailchimp builder that handles code-your-own templates and RSS content.
- The plan gate that surprises people: anyone can create a custom-coded template, but sending one needs the Standard plan or higher (from $20 a month). Free and Essentials accounts must upgrade to send it.
- Best external builder for Mailchimp: Postcards. Paid plans (from $19 a month) push finished templates into Mailchimp in one click; the free plan exports HTML or a ZIP (5 a month) to import yourself. Either way it arrives as custom HTML, so the Standard rule above applies.
- Cheapest paid one-click push to Mailchimp: Topol.io at $10 a month, with no free plan.
Mailchimp’s email builders in 2026: new vs legacy
Mailchimp’s help center lists 2 email builders, the new builder and the legacy builder. Both use drag-and-drop blocks and Mailchimp’s templates; they differ in features and in code support.
Which builder you are on
- New accounts get the new builder. Accounts created after July 2023, or that never used the legacy builder, default to the new builder with no option to change it.
- Older accounts can switch. If you have used the legacy builder, change the default under your profile icon, Account & billing, Settings, Details, Default Email Builder.
- Existing designs stay put. A template or email always opens in the builder it was made in.
- Plans don’t decide the builder. Mailchimp’s help pages don’t tie either builder to a plan. What your plan changes is the template selection, whether you can send custom code, and inbox preview (see the plan table below).
New builder vs classic (legacy) builder
| New builder | Legacy builder | |
|---|---|---|
| Default for | Accounts created after July 2023, or that never used legacy | Accounts that chose it as default |
| Undo and redo | Yes | Not listed |
| Separate desktop and mobile styles per block | Yes (“unlink” styles) | No |
| Columns | Drag blocks into up to 4 columns, or use layouts | Column layout set by the template |
| Exclusive blocks | Survey, Apps, Spacer, Payment | RSS Header, RSS Items, Share, Image Group, Image Card |
| Code your own template | Opens the legacy builder | Yes, the only builder that supports it |
The new builder is the better drag-and-drop editor. The legacy builder survives mainly for custom HTML and RSS.
Templates: Mailchimp, saved, and code your own
When you design an email in the new builder, Mailchimp offers these starting points:
- Mailchimp templates. Mailchimp advertises more than 130, filterable by category, type (Fully designed or Basic layout), style, and industry. Free gets a limited selection; Essentials and up get all.
- Branded templates. With a Brand Kit set up, an Apply Brand Kit toggle previews every template in your colors, fonts, logo, and button styles. This needs Essentials or higher.
- Saved templates. Any email you save as a template. A template saved from the new builder can only be used in the new builder. One-column emails designed in the legacy builder can also be used in the new builder.
- Recently sent and drafts. An exact copy of a past email to edit.
- Code your own. Paste HTML, import an HTML file, or import a ZIP. This runs in the legacy builder and Mailchimp calls it an advanced feature.
Custom-coded templates can use Mailchimp’s template language: attributes such as mc:edit="body" mark editable regions, so a non-coder can later change text and images in the designer.
What each Mailchimp plan includes for email design
Prices are the starting monthly prices on Mailchimp’s compare plans page in USD, and they rise with your contact count.
| Free | Essentials | Standard | Premium | |
|---|---|---|---|---|
| Starting price | $0 | $13/mo | $20/mo | $350/mo |
| Contacts | Up to 250 | Up to 50,000 | Up to 100,000 | Up to 200,000 (custom above) |
| Monthly sends | 500 (250 a day) | 10x contact limit | 12x contact limit | 15x contact limit |
| Seats | 1 | 3 | 5 | Unlimited |
| Mailchimp templates | Limited | All | All | All |
| Custom-coded templates | Create only | Create only | Create and send | Create and send |
| Inbox preview | No | No | Yes | Yes |
| Remove Mailchimp branding | No | Yes | Yes | Yes |
Essentials and Standard come with a 14-day free trial. One wrinkle: Mailchimp’s preview help article says inbox preview is included with Standard or higher, while a later line on the same page says “if you have a paid plan.” We went with the stricter Standard rule in the table.
How to build an email in Mailchimp, step by step
These steps follow Mailchimp’s help articles for the new builder.
- Create the email. On the home page, click Create, open the Email drop-down, and choose Regular. Add an internal name and click Begin.
- Fill in the checklist. The email checklist has 4 required parts: To (audience or segment), From (name and sender address), Subject (up to 150 characters, with 60 or fewer recommended), and Content.
- Pick a template. In Content, open the design step and choose a Mailchimp template, a saved template, a recently sent email, a draft, or Code your own.
- Set default styles. Click Styles. The Desktop tab sets background and body colors, text, links, buttons, and dividers. The Mobile tab sets padding, text, button size, and dividers.
- Add content blocks and layouts. Click Add, then drag blocks into the email. Use the Layouts tab for columned sections, or drag blocks side by side for up to 4 columns. Apps, Product, and Product Rec blocks can’t go inside layouts.
- Fine-tune mobile. Select a block, open its Styles tab, and switch off Link Desktop and Mobile Styles to give that block its own alignment, padding, and margin per device.
- Preview and test. Click Preview to see desktop and mobile, then Inbox for specific email clients if your plan includes it. Use Check email links to confirm every URL, then send a test. Each test email counts toward your monthly send limit.
- Save, and save as a template. Click Save and exit. To reuse the design, open the Save and exit drop-down and choose Save as a template.
For layout rules that hold up in Gmail’s app, see our guide to responsive email templates for Gmail.
Limits people hit in the Mailchimp builder
Plan-gated features
- Custom HTML needs Standard to send. Mailchimp’s import help article says Standard or higher can use custom HTML templates, and the plan comparison marks Free and Essentials as “create, upgrade to send.” Essentials is paid and still can’t send them.
- Inbox preview needs Standard. On Free and Essentials you get desktop and mobile previews only.
- Free gets a limited template set, 1 seat, Mailchimp branding, and no email scheduling.
- Test emails use up sends. On the Free plan’s 500 sends a month, heavy testing adds up.
Custom code limits
- No JavaScript. Mailchimp removes detectable JavaScript from Code blocks.
- The Code block cleans your HTML. It keeps a list of supported elements (tables, paragraphs, headings, images, links, and a few others) and removes the rest. It is meant for snippets, not for pasting a full template.
- Editing a template changes drafts. Changes to a code-your-own template carry over to draft and scheduled campaigns that use it.
- Edit Code only lives in the template builder. You can’t open the HTML editor from the campaign builder.
- No link checker for custom templates. Mailchimp’s link checker isn’t available for Code your own templates, so click every link in your test email.
Responsiveness controls
The new builder’s Mobile styles tab and per-block overrides cover padding, alignment, margin, text, buttons, and dividers only. You can’t write your own breakpoints in the visual editor. Legacy templates are built no wider than 600 pixels, and settings can’t change that. For custom code, Mailchimp recommends 600 or 640 pixel layouts, inline CSS, and media queries, and advises against floats, positioning, and background images (which don’t work in Outlook or Gmail).
Moving templates between accounts or tools
- Between Mailchimp accounts: easy. Open Email templates, click the template’s drop-down, and choose Share. You can send the link by email or copy a unique URL. The recipient logs in and the template is added to their account, with no HTML export or import.
- Between builders: one way. New-builder templates can’t move into the legacy builder.
- Out of Mailchimp: harder. Code-your-own templates have an Export template menu option, but we found no help article documenting an HTML export for drag-and-drop designs. If you might switch platforms, keep master designs in an external builder that exports HTML.
How to use an external builder with Mailchimp
An external builder is worth it when you want more design control than Mailchimp’s blocks give, need one template in several email platforms, or want modules such as countdown timers and AMP. Either way, the result lands in Mailchimp as a custom HTML template, so you need Standard or higher to send it.
Option 1: push from Postcards in one click
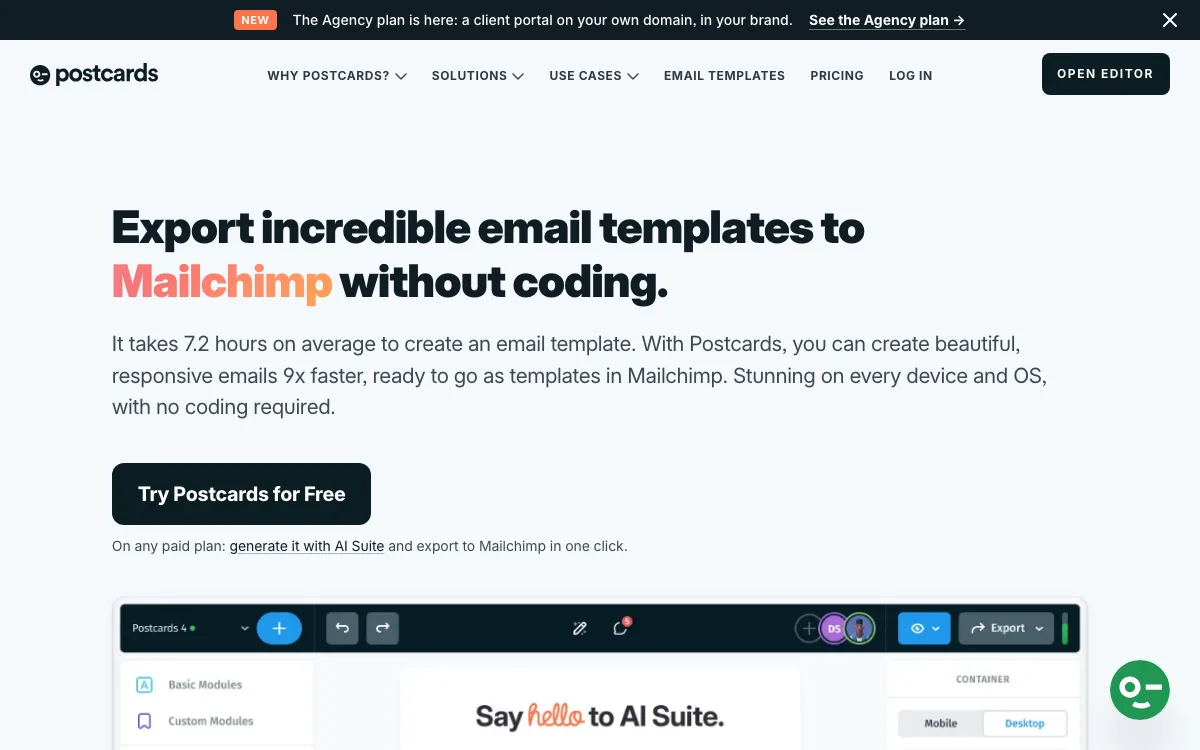
Designmodo’s Postcards Mailchimp integration works in three steps, according to Designmodo. Postcards’ FAQ lists ESP integrations among the paid features, so this route needs Plus or Pro:
- Design in Postcards. Pick a layout or template, add your images and copy, and preview it in Gmail, Outlook, Apple Mail, and Yahoo (paid plans).
- Press Export and choose Mailchimp. The first time, Mailchimp opens a sign-in window so you can authorize Postcards. You can connect more than one Mailchimp account.
- Find it in Mailchimp. The finished template appears in your account, where you can send a test or edit its HTML, so expect it to behave as a custom-coded template.
The same Export menu also downloads an HTML ZIP or copies the code, which works on the free plan with Option 2.
Option 2: import HTML or a ZIP as a code-your-own template
This works with any builder that exports HTML. Per Mailchimp’s import help article:
- In Mailchimp, click Campaigns, then Email templates.
- Click Code your own, then pick one of three methods:
- Paste in code: click Continue, paste your HTML into the Edit code field, and click Save.
- Import HTML: click Import HTML, then Add file.
- Import ZIP: click Import ZIP, then Add file.
- Use Edit Design for section styles and images, and Preview and Test to send a test.
- Click Save and Exit, name the template, and click Save.
- To use it, open Email templates, click the template’s drop-down, and choose Create campaign.
ZIP rules. The file must be under 1MB and contain only 1 HTML file. Put images in the root folder, not subfolders, use only letters, numbers, and hyphens in file names, and match file name case exactly in your code. Mailchimp uploads the images to its content studio and rewrites the paths, so your images no longer depend on the builder’s hosting.
Checklist before you send an imported template
- Unsubscribe tag. Mailchimp requires
*|UNSUB|*in every campaign. Add it if your builder’s footer doesn’t have it. - Merge tags. Add personalization such as
*|FNAME|*in Mailchimp or in the builder’s HTML. - Effects. Postcards’ FAQ notes that Mailchimp removes drop-shadow code, and some email clients ignore CSS such as box-shadow and border-radius, so don’t rely on them.
- Encoding and images. Use UTF-8 and JPG, JPEG, PNG, or GIF images. Mailchimp also validates the HTML syntax.
- Test. Check every link by hand, then run the template through a tool from our list of email testing tools if you don’t have Mailchimp’s inbox preview.
External builders that export to Mailchimp, compared
Prices are regular monthly prices in USD, checked on each vendor’s pricing page in November 2026. For a full review of each tool, see our comparison of the best email template builders.
| Builder | How it gets to Mailchimp | Free plan | Paid from (monthly) | Key limit |
|---|---|---|---|---|
| Postcards | One-click export (paid plans), or HTML/ZIP | Yes, 10 projects, 5 exports/mo | $19/mo (Plus) | Plus caps exports at 20/mo, 5/day |
| Topol.io | Mailchimp integration, or HTML | No, 14-day trial | $10/mo (PRO) | No free plan |
| Tabular | Mailchimp integration, or HTML | Yes, 3 emails, 3 exports/mo | $29/mo (Plus) | Plus caps exports at 100/mo |
| Chamaileon | Built-in Mailchimp integration | No | From $400/mo | Sales-led, high entry price |
| Unlayer | HTML export from your own app | Yes | $250/mo (Launch) | Embeddable SDK for developers, no Mailchimp push found |
Postcards is the most complete fit for a Mailchimp user: a free plan, client previews (20 a month on Plus, 50 on Pro), countdown timers and AMP on paid plans, and HTML email import that turns an existing email into an editable design (5 free imports on Start). Plus is $19 a month; Pro is $29 a month with unlimited exports and 3 editors. Billed yearly, they are $16 and $24 a month. The limits: the free plan has 0 AI credits, no client previews, and no one-click ESP export, Plus caps exports at 20 a month, the integrations list covers 18 email platforms, and it runs only in the browser. A refund cancels the license and the emails made under it. If a paid license lapses, hosted images are deleted after 14 days, so if your ZIP includes the images and stays under 1MB, importing it lets Mailchimp host them instead.
Topol.io is the cheapest paid option at $10 a month (Team is $15), with a two-click Mailchimp connection but no free plan. Tabular Pro is $42 a month for 3 members and unlimited exports. Chamaileon starts at $400 a month or $4,000 a year, for large teams. Unlayer is a builder SaaS companies embed in their own product, so it suits developers, not a marketing team.
If your brand assets live in Canva, our guide to Canva email templates covers Canva’s direct Mailchimp publishing and where it falls short.
Which route should you choose?
- You are on Free or Essentials and send simple newsletters: stay in the new builder. Custom HTML won’t send until you upgrade.
- You are on Standard or Premium and want designs Mailchimp’s blocks can’t make: design in Postcards and push to Mailchimp, or import a ZIP.
- You might leave Mailchimp one day: keep master designs in an external builder that exports HTML, so you aren’t rebuilding every template.
- You need RSS-to-email: use the legacy builder; the new builder has no RSS blocks.
- You are a developer: code your own template with Mailchimp’s template language, or start from our guide to Bootstrap email templates.
FAQ
What is the difference between the new and classic Mailchimp builder?
Mailchimp now calls the classic builder the legacy builder. The new builder is the default, with undo and redo, per-device styles, and Survey and Apps blocks. The legacy builder is the only one that supports code-your-own templates and RSS blocks.
Can I use custom HTML in Mailchimp on the free plan?
You can create a custom-coded template on Free and Essentials, but you can’t send it. Mailchimp’s plan comparison lists sending custom-coded templates on Standard (from $20 a month) and Premium only.
How do I import an HTML template into Mailchimp?
Go to Campaigns, then Email templates, then Code your own. Paste your code, import an HTML file, or import a ZIP under 1MB with one HTML file and images in the root folder. Save it, then choose Create campaign from the template’s drop-down.
Can I move a Mailchimp template to another account?
Yes. Use Share on the template’s drop-down to send a link by email or copy a unique URL. The other account owner opens the link, logs in, and the template is added, with no HTML export needed.
Does Postcards work with Mailchimp?
Yes. On paid plans, Postcards’ one-click Mailchimp export places the finished template in your account after a one-time sign-in. Every plan can export HTML or a ZIP to import manually. The template arrives as custom HTML, so sending it from Mailchimp needs Standard or higher.
Build your Bootstrap theme
Design a custom Bootstrap 5 theme visually with a live preview, then export clean Sass or CSS.
Open the Builder